OS4X installation first steps
Jump to navigation
Jump to search
Setup OS4Xvirtual
Preparation
- If not already done, download and import the virtual disk image, which fits your virtualization environment.
- Check that you can provide at least two cores, 50GB disk space and 1GB system memory as minimum as well as a network connection.
First boot
- Depending on the speed of your virtualization host, the first boot may take a few moments.

1. set an initial password for the root user, this can be changed later.
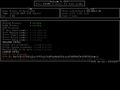
2. after the system has booted completely, you'll see the OS4X overview.


Configuration wizard
The following steps will be done in a web browser.
- navigate to your machine using the newly assigned IP, in our example http://192.168.0.76/.
- You will be automatically redirected to the OS4X installation wizard.
- Depending on which edition of OS4X you are installing, more or less information are requested.
Own Company
- The name of your company is required in any cases
- Odette Settings are required in combination with OS4X Core and OS4X Enterprise
- OFTP SSID and OFTP2 SSID may already be available and can be reused or
- can be provided by c-works.
- OFTP password is used for additional identification within the OFTP protocol and
- consists of a maximum of 8 numbers and / or capital letters
- External hostname is the FQDN of your installation but
- does not have to be resolvable at this point of configuration.
- The Location, Department and Person tabs are required for OS4X Enterprise and OS4X Portal
- The persons unique address code can be chosen freely and usually
- consists of a maximum of 5 numbers and / or capital letters.
- The persons username and password is used for internal authentication and can chosen freely when using "internal" as authentication method.
- Additional authentication methods are available, but require special configuration.
Example configuration for OS4X Enterprise:
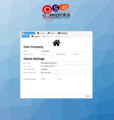
Company and Odette settings
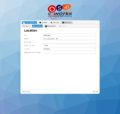
Location settings

Department settings
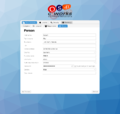
Person settings


License

- The OS4X-ID is unique for each system and will be used to issue an OS4X license.
- A license is required for system operation, but can be omitted during the installation wizard.
- If you have received your license via email, or want to reuse a license from a previous installation, you can upload it here.
- For testing purposes, a temporary license, with two weeks validity, can be obtained directly within the wizard.
- The license can be changed at any time to unlock new features or upgrade the installation.
For our example configuration:
Valid temporary license

Security

- If you need to restrict access to the administrative interface, you can configure a simple username / password protection here.
- This step is optional, .htaccess protection can be enabled / disabled at any time.
- info: This configuration is not related to the username and password you may have set in the Own Company tab.
In our example, security was skipped.
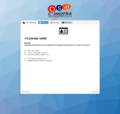
Summary
The summary tab should be self explanatory.

Summary of the example configuration

Next steps

Congratulations, you just completed the wizard! you may want to continue with one of following guides:
- Request or upload a certificate
- Update to the latest version
- Set up a partner for data exchange