Difference between revisions of "OS4X Webaccess creating a receive job"
Jump to navigation
Jump to search
| (One intermediate revision by the same user not shown) | |||
| Line 1: | Line 1: | ||
| − | |||
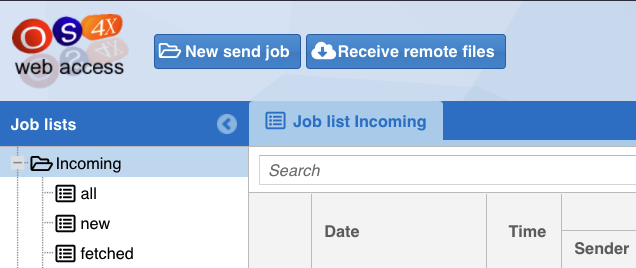
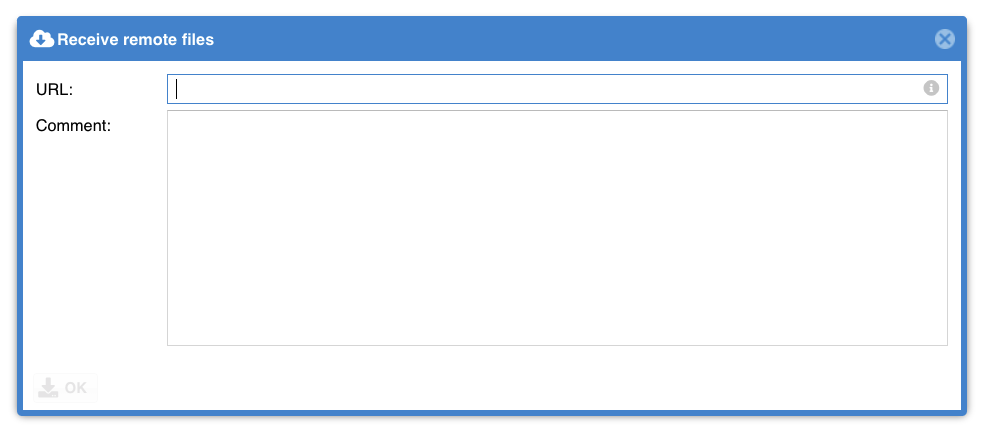
If enabled, by clicking on the second button from the left "<i class="fa fa-cloud-download-alt" aria-hidden="true"></i> Receive remote files" a popup window opens, where you can enter a URL to get as a receive job: | If enabled, by clicking on the second button from the left "<i class="fa fa-cloud-download-alt" aria-hidden="true"></i> Receive remote files" a popup window opens, where you can enter a URL to get as a receive job: | ||
| Line 11: | Line 10: | ||
You will then be taken to the Receive Queue, filtered to your filename. Here you can follow the progress of the file download. | You will then be taken to the Receive Queue, filtered to your filename. Here you can follow the progress of the file download. | ||
| + | |||
| + | [[File:Bildschirmfoto 2021-09-27 um 11.35.40.png]] | ||
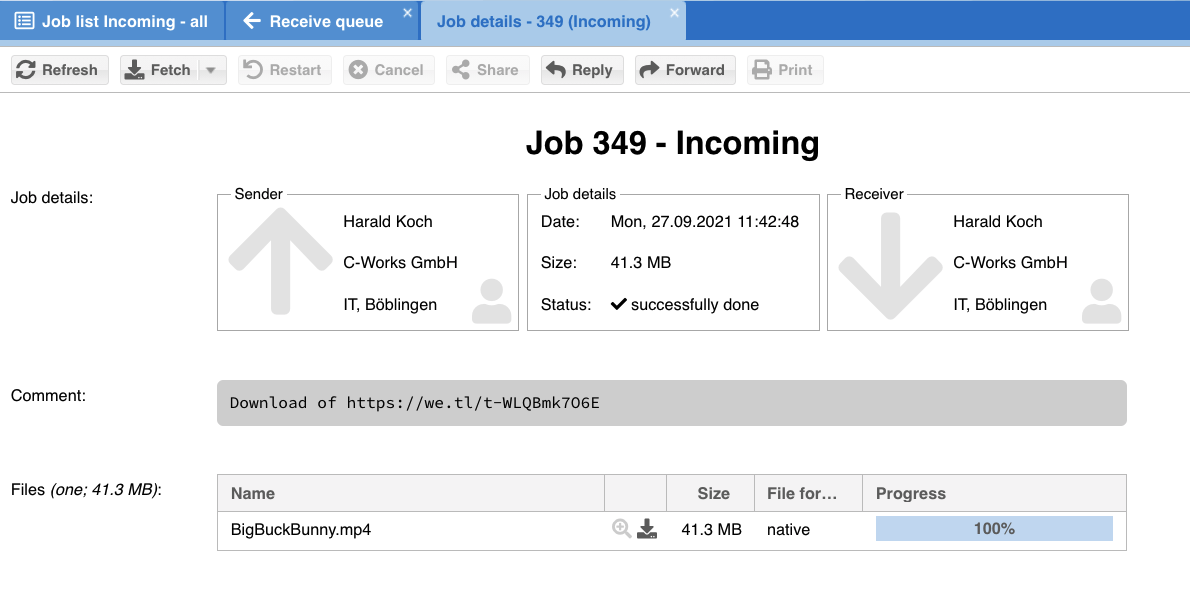
When the download has finished, a receive job will be created and its job details automatically opened. | When the download has finished, a receive job will be created and its job details automatically opened. | ||
| + | |||
| + | [[File:Bildschirmfoto 2021-09-27 um 12.22.12.png]] | ||
Latest revision as of 12:05, 27 September 2021
If enabled, by clicking on the second button from the left " Receive remote files" a popup window opens, where you can enter a URL to get as a receive job:
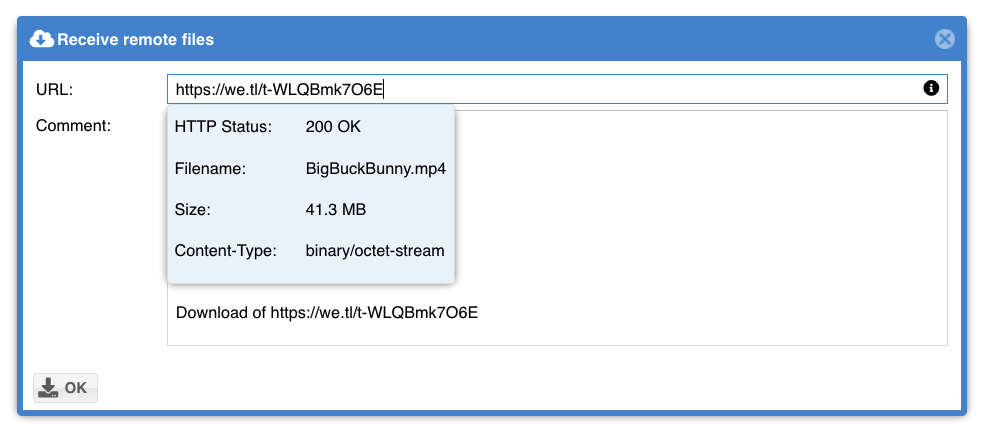
When a URL is entered into the 'URL' field, it will be checked. The small info icon at the right end of the URL field allows you to view further details about the URL. If it is valid you can start the transfer by clicking the button 'OK' button in the bottom left corner of the window.
You will then be taken to the Receive Queue, filtered to your filename. Here you can follow the progress of the file download.
When the download has finished, a receive job will be created and its job details automatically opened.


