Difference between revisions of "OS4X Webaccess add files"
| (6 intermediate revisions by the same user not shown) | |||
| Line 1: | Line 1: | ||
| + | Adding files to a new send job is possible in various ways. Depending on the configuration of OS4X and the available web browser you use, you have the following possibilities to add files: | ||
| + | |||
| + | == Simple file upload == | ||
| + | |||
When adding files, just click on the button "Browse" of the "Files" section of the new send job: | When adding files, just click on the button "Browse" of the "Files" section of the new send job: | ||
[[Image:Webaccess upload file.png]] | [[Image:Webaccess upload file.png]] | ||
| + | |||
| + | Depending of your web browser's technology, a simple file selection window opens of your operating system. This way, you can select any file to be uploaded to the server. Selecting multiple files is supported, too: | ||
| + | |||
| + | |||
| + | [[Image:Webaccess file upload select multi.png]] | ||
| + | |||
| + | After selecting the file(s), upload starts instantly. A progress bar shows you the progress of the upload. | ||
| + | |||
| + | [[Image:Webaccess uploaded files.png]] | ||
| + | |||
| + | It's not possible to upload two files with the same filename. Empty file upload (=files with the size of 0 bytes) is supported. | ||
| + | |||
| + | == Pre-processing local files and upload == | ||
| + | If your system administrator enabled the functionality for local file processing and configured the integration correctly for your platform, and also the OS4X Webaccess webbrowser plugin is installed in your webbrowser, you can select files from hierarchically organized logical directories (so-called "DLNames"): | ||
| + | |||
| + | [[Image:Webaccess DLName button.png]] | ||
| + | |||
| + | The opening window presents you the possibility to select an available environment: | ||
| + | |||
| + | [[Image:Webaccess DLName window.png]] | ||
| + | |||
| + | You can: | ||
| + | === Select environment === | ||
| + | [[Image:Webaccess DLName select environment.png]] | ||
| + | |||
| + | By selecting an environment, the grid below loads the available DLNames contained in this environment. The last selected environment is saved in your user's configuration. | ||
| + | |||
| + | === Search in DLName list === | ||
| + | [[Image:Webaccess DLName search list.png]] | ||
| + | |||
| + | You can limit the displayed DLNames (which can be a lot) by entering a single search string which must be contained in the DLName. | ||
| + | |||
| + | === Select a DLName === | ||
| + | By selecting a DLName from the list, the content of that directory is listed in the right grid. A list if filenames, sized and last access dates is available. | ||
| + | |||
| + | [[Image:Webaccess DLName show content.png]] | ||
| + | |||
| + | === Search in file list === | ||
| + | By adding a search string to the top search panel and/or by selecting the requested file appendix from the "Format" list, you can search in the list of files. | ||
| + | |||
| + | [[Image:Webaccess DLName search files.png]] | ||
| + | |||
| + | === Start export process === | ||
| + | By selecting one or more files from the file list, the "Export" button becomes active. By pressing the "Export" button, the administratively configured export process starts with the file selection. | ||
| + | |||
| + | [[Image:Webaccess DLName start export.png]] | ||
| + | |||
| + | [[Image:Webaccess DLName exporting.png]] | ||
| + | |||
| + | |||
| + | If everything is exported correctly, the resulting file(s) will be uploaded to the new send job. If an error occurs, a window appears showing the state of the export. | ||
| + | |||
| + | [[Image:Webaccess DLName export error.png]] | ||
| + | |||
| + | == Server side file selection == | ||
| + | If no file upload is requested, users can select a file from the server's directory pool. If administratively enabled, a server file selection button appears as a file selection possibility: | ||
| + | |||
| + | [[Image:Webaccess server file selection button.png]] | ||
| + | |||
| + | At the left side, a directory tree shows you the configured directories (optionally as a descriptor; if no description is given, the directory name is displayed). You can browse through the directories as you would expect it with a file manager of your choice. | ||
| + | |||
| + | After selecting a directory, the content of the directory is displayed at the right grid, containing the file names, size and last modification date. You can filter in the file names for a given simple search string. Sorting is implemented. By pressing the shift button during file selection, a mass selection is available. You can disable a selection in the mass selection by pressing the corresponding mass (de-)selection button for your platform: | ||
| + | *Windows and Linux: Ctrl | ||
| + | *Mac OS X: Cmd | ||
| + | |||
| + | By selecting one or more files, the "Accept" button at the bottom becomes active. By pressing this button, the selected files are taken into the new send job instantly without modification. | ||
| + | |||
| + | [[Image:Webaccess server file selection window.png]] | ||
Latest revision as of 08:43, 15 January 2014
Adding files to a new send job is possible in various ways. Depending on the configuration of OS4X and the available web browser you use, you have the following possibilities to add files:
Simple file upload
When adding files, just click on the button "Browse" of the "Files" section of the new send job:
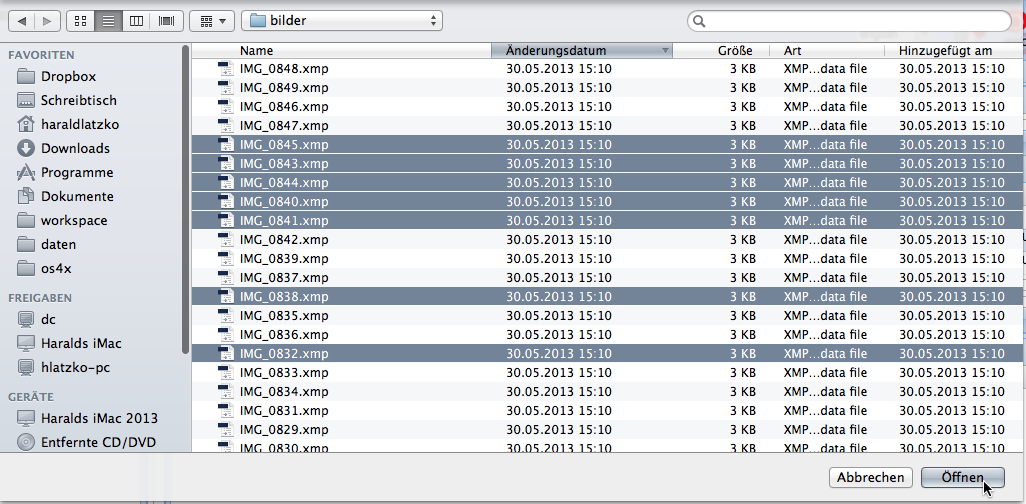
Depending of your web browser's technology, a simple file selection window opens of your operating system. This way, you can select any file to be uploaded to the server. Selecting multiple files is supported, too:
After selecting the file(s), upload starts instantly. A progress bar shows you the progress of the upload.
It's not possible to upload two files with the same filename. Empty file upload (=files with the size of 0 bytes) is supported.
Pre-processing local files and upload
If your system administrator enabled the functionality for local file processing and configured the integration correctly for your platform, and also the OS4X Webaccess webbrowser plugin is installed in your webbrowser, you can select files from hierarchically organized logical directories (so-called "DLNames"):
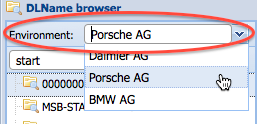
The opening window presents you the possibility to select an available environment:
You can:
Select environment
By selecting an environment, the grid below loads the available DLNames contained in this environment. The last selected environment is saved in your user's configuration.
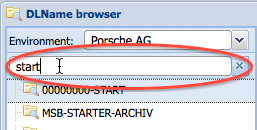
Search in DLName list
You can limit the displayed DLNames (which can be a lot) by entering a single search string which must be contained in the DLName.
Select a DLName
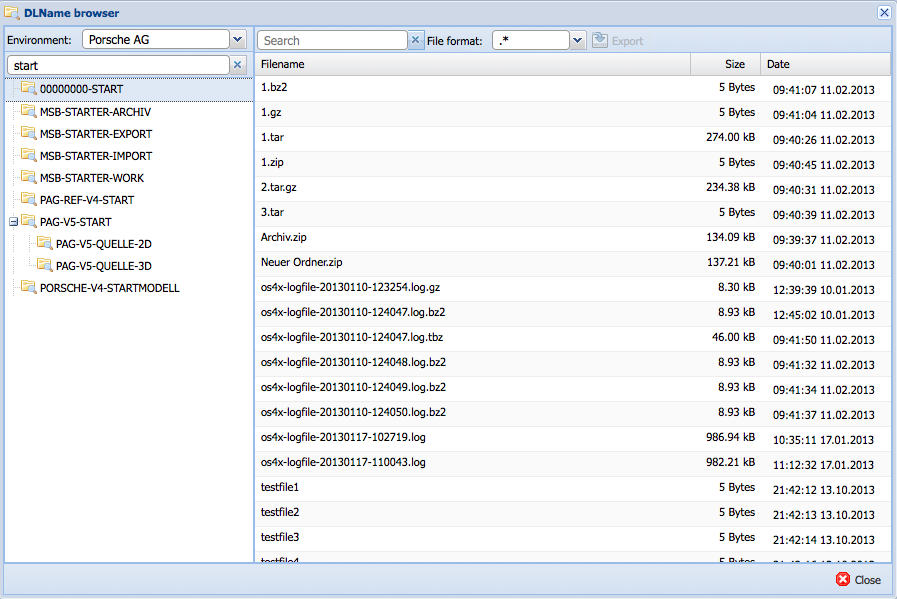
By selecting a DLName from the list, the content of that directory is listed in the right grid. A list if filenames, sized and last access dates is available.
Search in file list
By adding a search string to the top search panel and/or by selecting the requested file appendix from the "Format" list, you can search in the list of files.
Start export process
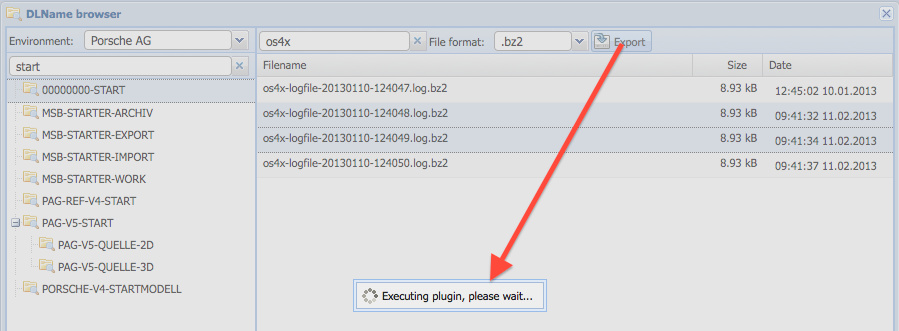
By selecting one or more files from the file list, the "Export" button becomes active. By pressing the "Export" button, the administratively configured export process starts with the file selection.
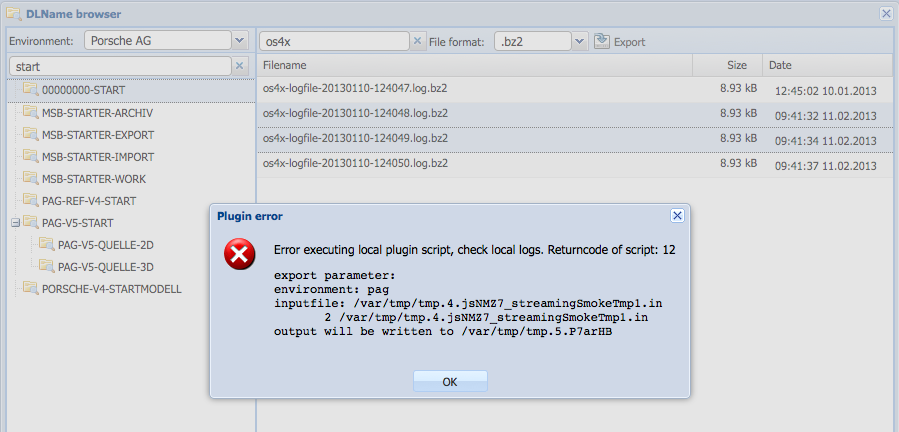
If everything is exported correctly, the resulting file(s) will be uploaded to the new send job. If an error occurs, a window appears showing the state of the export.
Server side file selection
If no file upload is requested, users can select a file from the server's directory pool. If administratively enabled, a server file selection button appears as a file selection possibility:
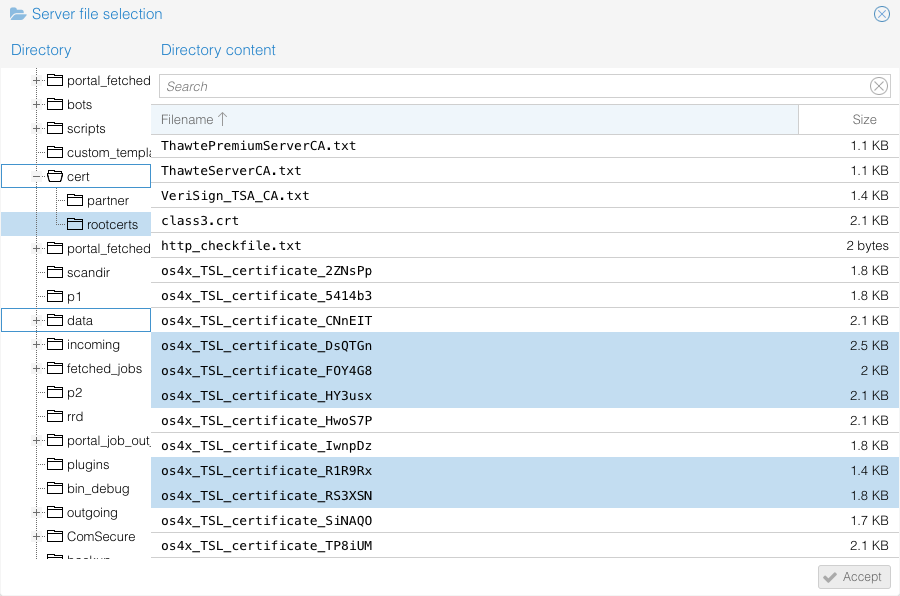
At the left side, a directory tree shows you the configured directories (optionally as a descriptor; if no description is given, the directory name is displayed). You can browse through the directories as you would expect it with a file manager of your choice.
After selecting a directory, the content of the directory is displayed at the right grid, containing the file names, size and last modification date. You can filter in the file names for a given simple search string. Sorting is implemented. By pressing the shift button during file selection, a mass selection is available. You can disable a selection in the mass selection by pressing the corresponding mass (de-)selection button for your platform:
- Windows and Linux: Ctrl
- Mac OS X: Cmd
By selecting one or more files, the "Accept" button at the bottom becomes active. By pressing this button, the selected files are taken into the new send job instantly without modification.

