OS4X VMware virtualized image - Hyper-V installation
Requirements
In order to install OS4Xvirtual, you will need to fulfill the following requirements:
- Hyper-V installed on your server environment
- Have the OS4Xvirtual disk image downloaded and extracted
Since virtualization can have complex setup, we will only cover the most basic installation tasks. If you already have a Hyper-V environment with complex configuration, you will be aware of these topics (like networking, disk image formatting, clustering etc.).
All screenshots and guides in this documentation refer to Windows Server 2016R2 Standard wiuth GUI in english. If you have another edition changed may appear. If you have no GUI on your server installed, you will have to configure all tasks remotely.
Hyper-V
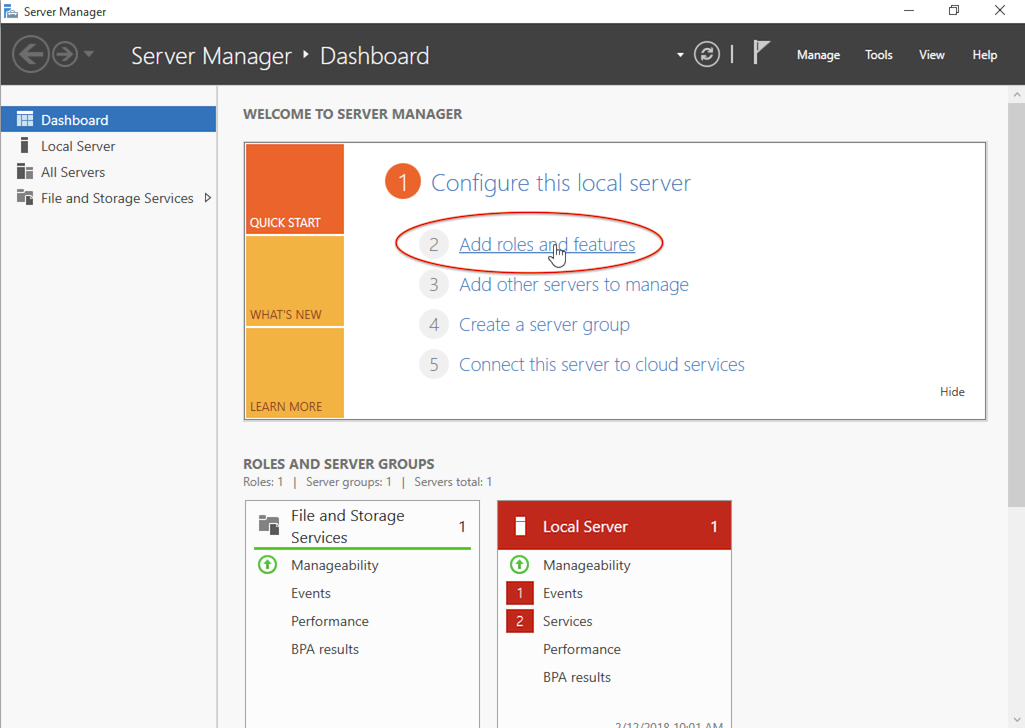
If you don't already have Hyper-V installed, you will have to install the server component first. In your server manager's dashboard, click on "Add roles and features":
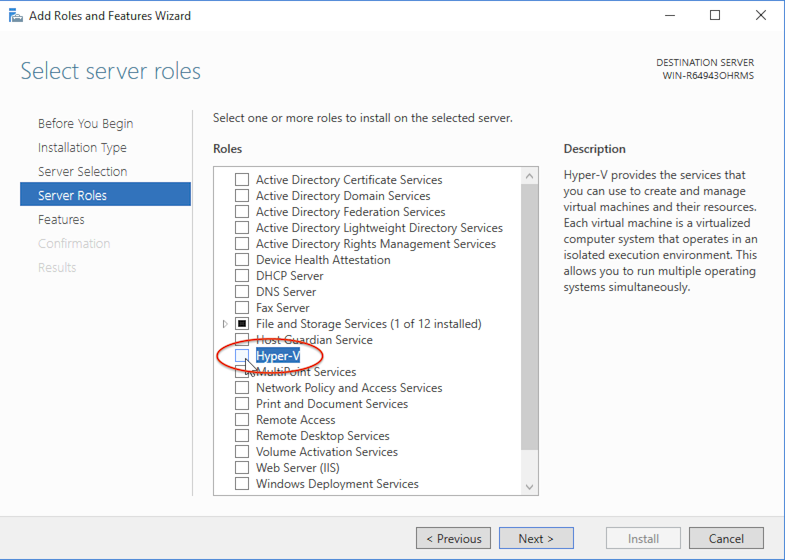
After clicking to all defaults, you can select the role "Hyper-V". Accept all recommendations as default.
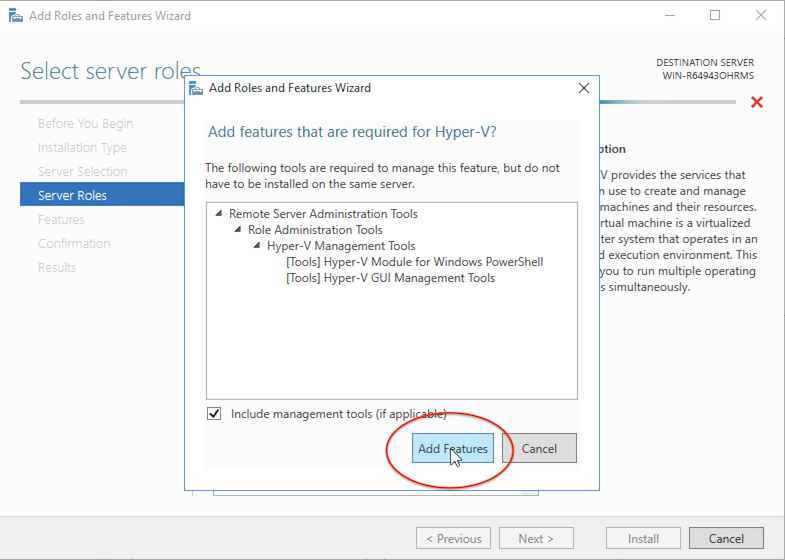
Click on "Add Features":
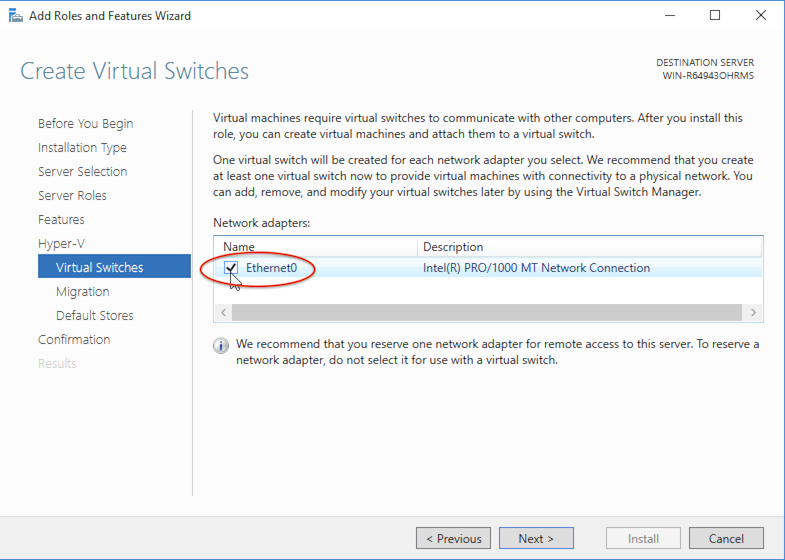
You then can configure some basic behaviour. Choose your network card for network connectivity of Hyper-V (you can change this afterwards):
At the end, click "Install". The installation proceeds in the background. A reboot is typically required after installation of Hyper-V.
Disk image
Download the Hyper-V disk image from http://www.os4x.com/downloads (choose "Virtual" as a platform). Extract the downloaded ZIP archive in order to extract the disk image (filename suffix: <code.vhd).
Optional: convert disk image
If you want to benefit from 2nd generation Hyper-V disk images, you can convert the 1st gen. disk image from VHD to VHDX. We provide a 1st gen. disk image for widest support for older Windows servers of our customers.
Virtual machine
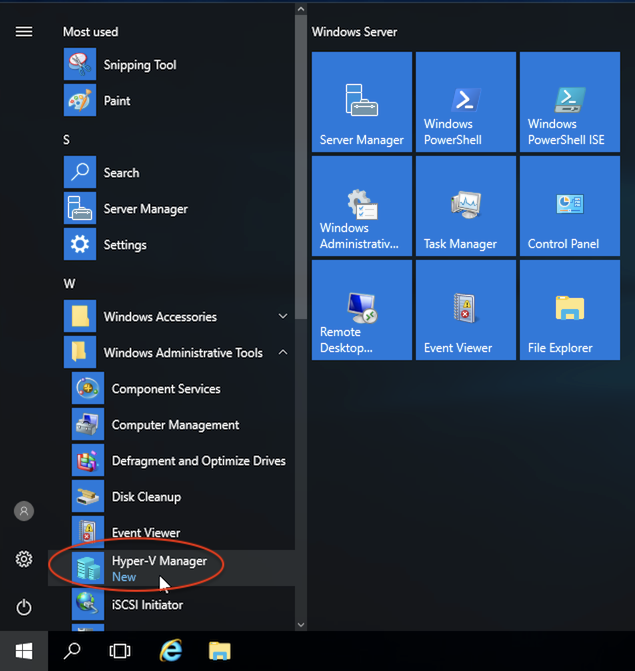
Start your Hyper-V manager (by default in the Windows start menu "Windows Administrative Tools"):
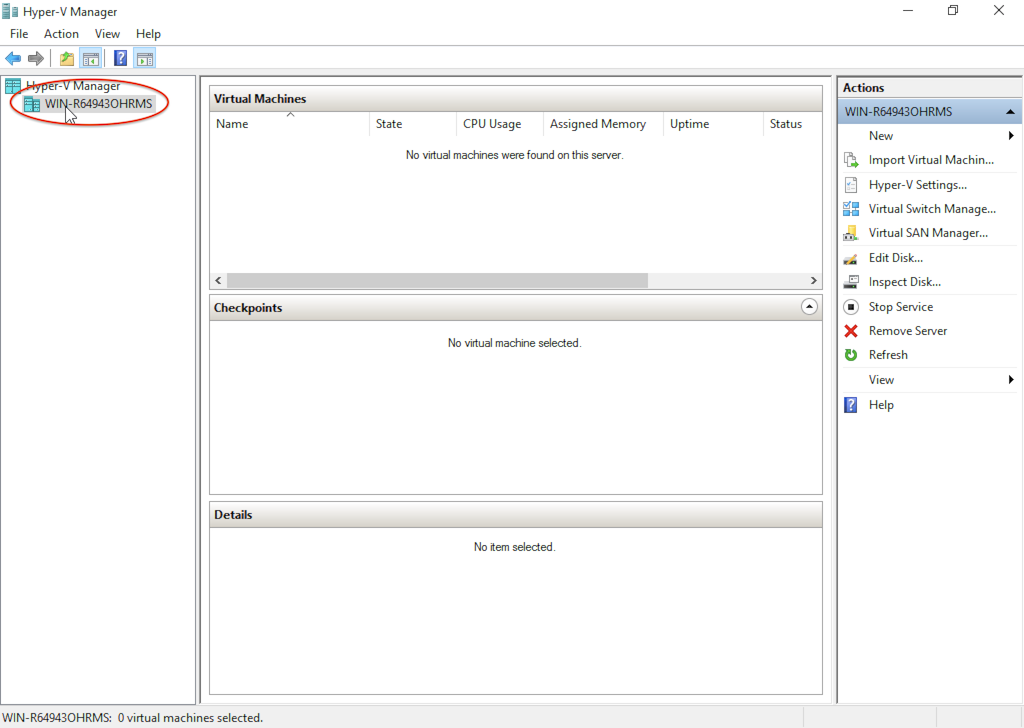
In your Hyper-V manager, select your local server (in the left panel):
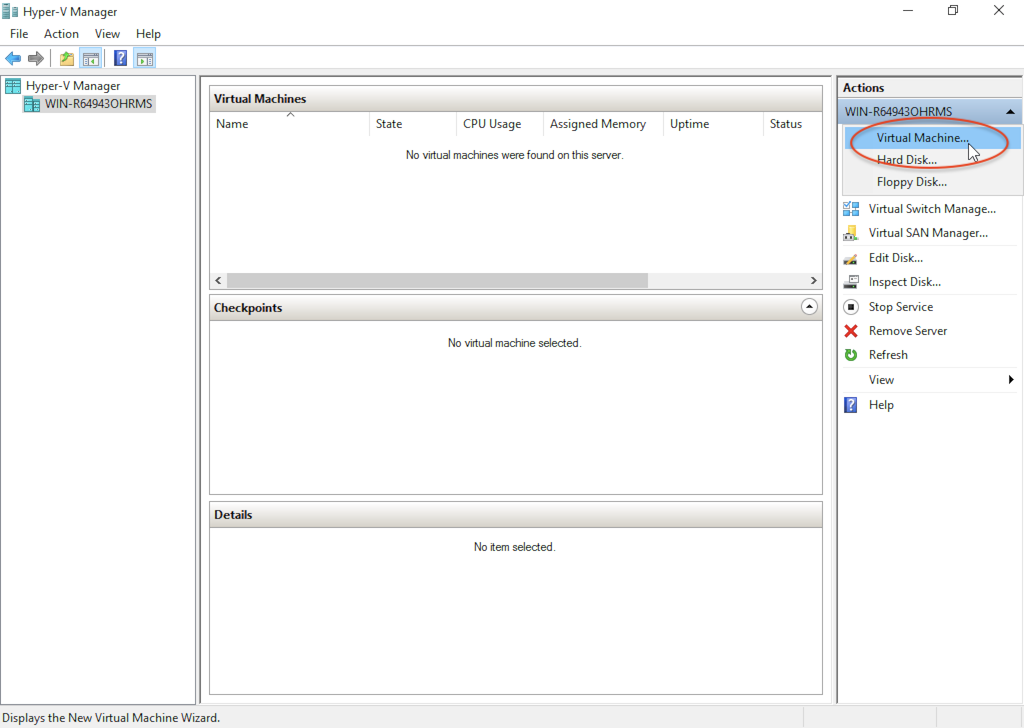
In the action menu, select "Virtual Machine..."
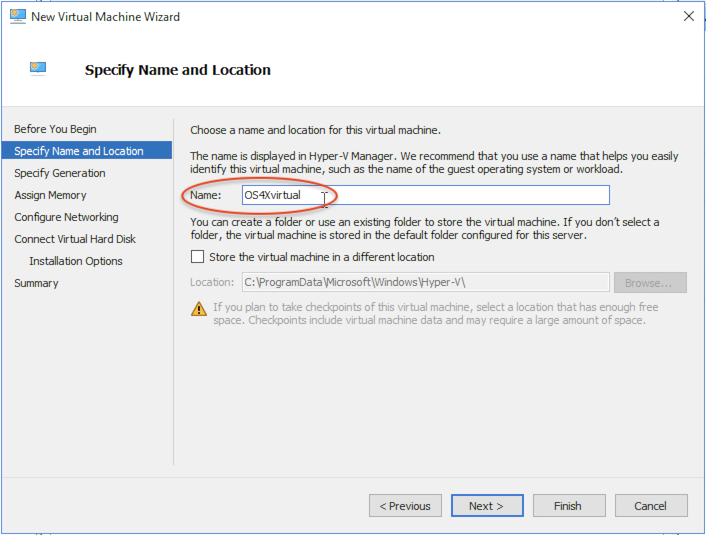
In the upcoming wizard, give a meaningful name for the virtual machine, according to your nameing conventions (in our example: "OS4Xvirtual"):
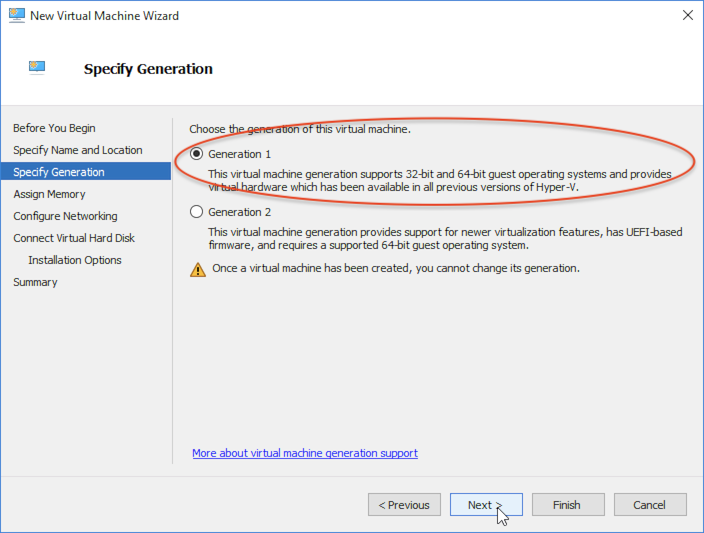
If you don't want to benefit from required features, you can use a 1st generation virtual machine. If you want to use a 2nd generation VM, you have to convert the disk image from VHD to VHDX format before-hand.
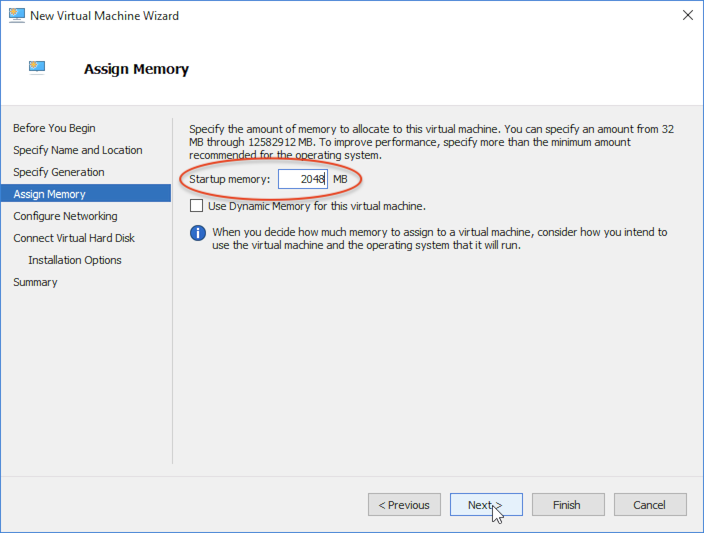
As a memory configured, we recomment at least 2048 MB of RAM (the more the better):
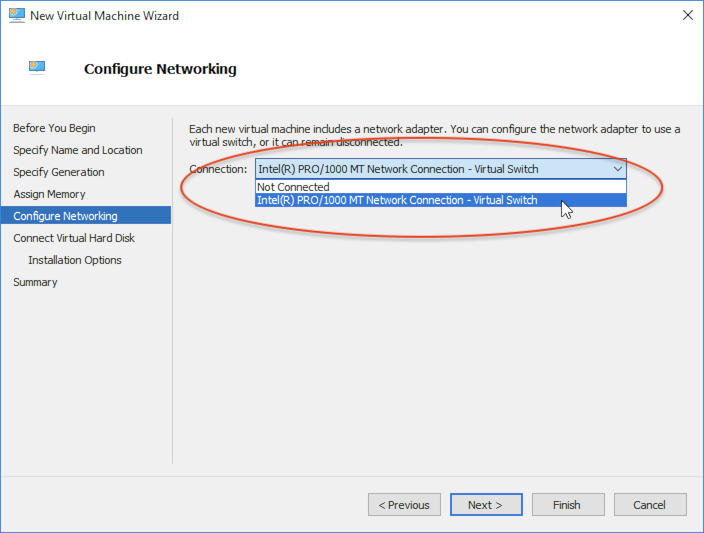
For networking connectivity, you require a network adapter to be present. If not connected to network, you won't be able to use the software.
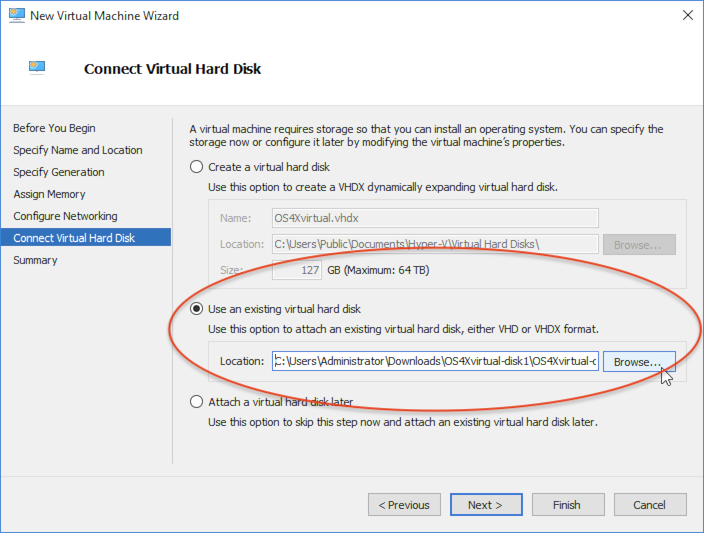
As a disk image, select the previously extracted disk image (VHD or converted VHDX, if 2nd gen. VM is used):
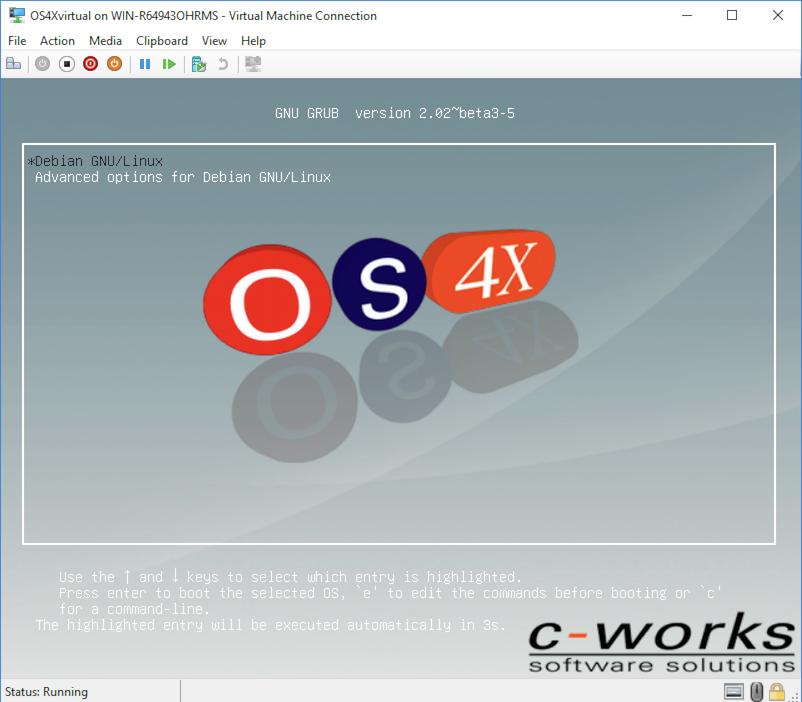
The rest of the wizard can be applied with default values. After that, the virtual machine is listed in the Hyper-V server and can be started:
